
Easy No Bake Biscoff Cheesecake
This post may contain affiliate links. If you click and purchase, we may earn a small commission. Read our full disclosure.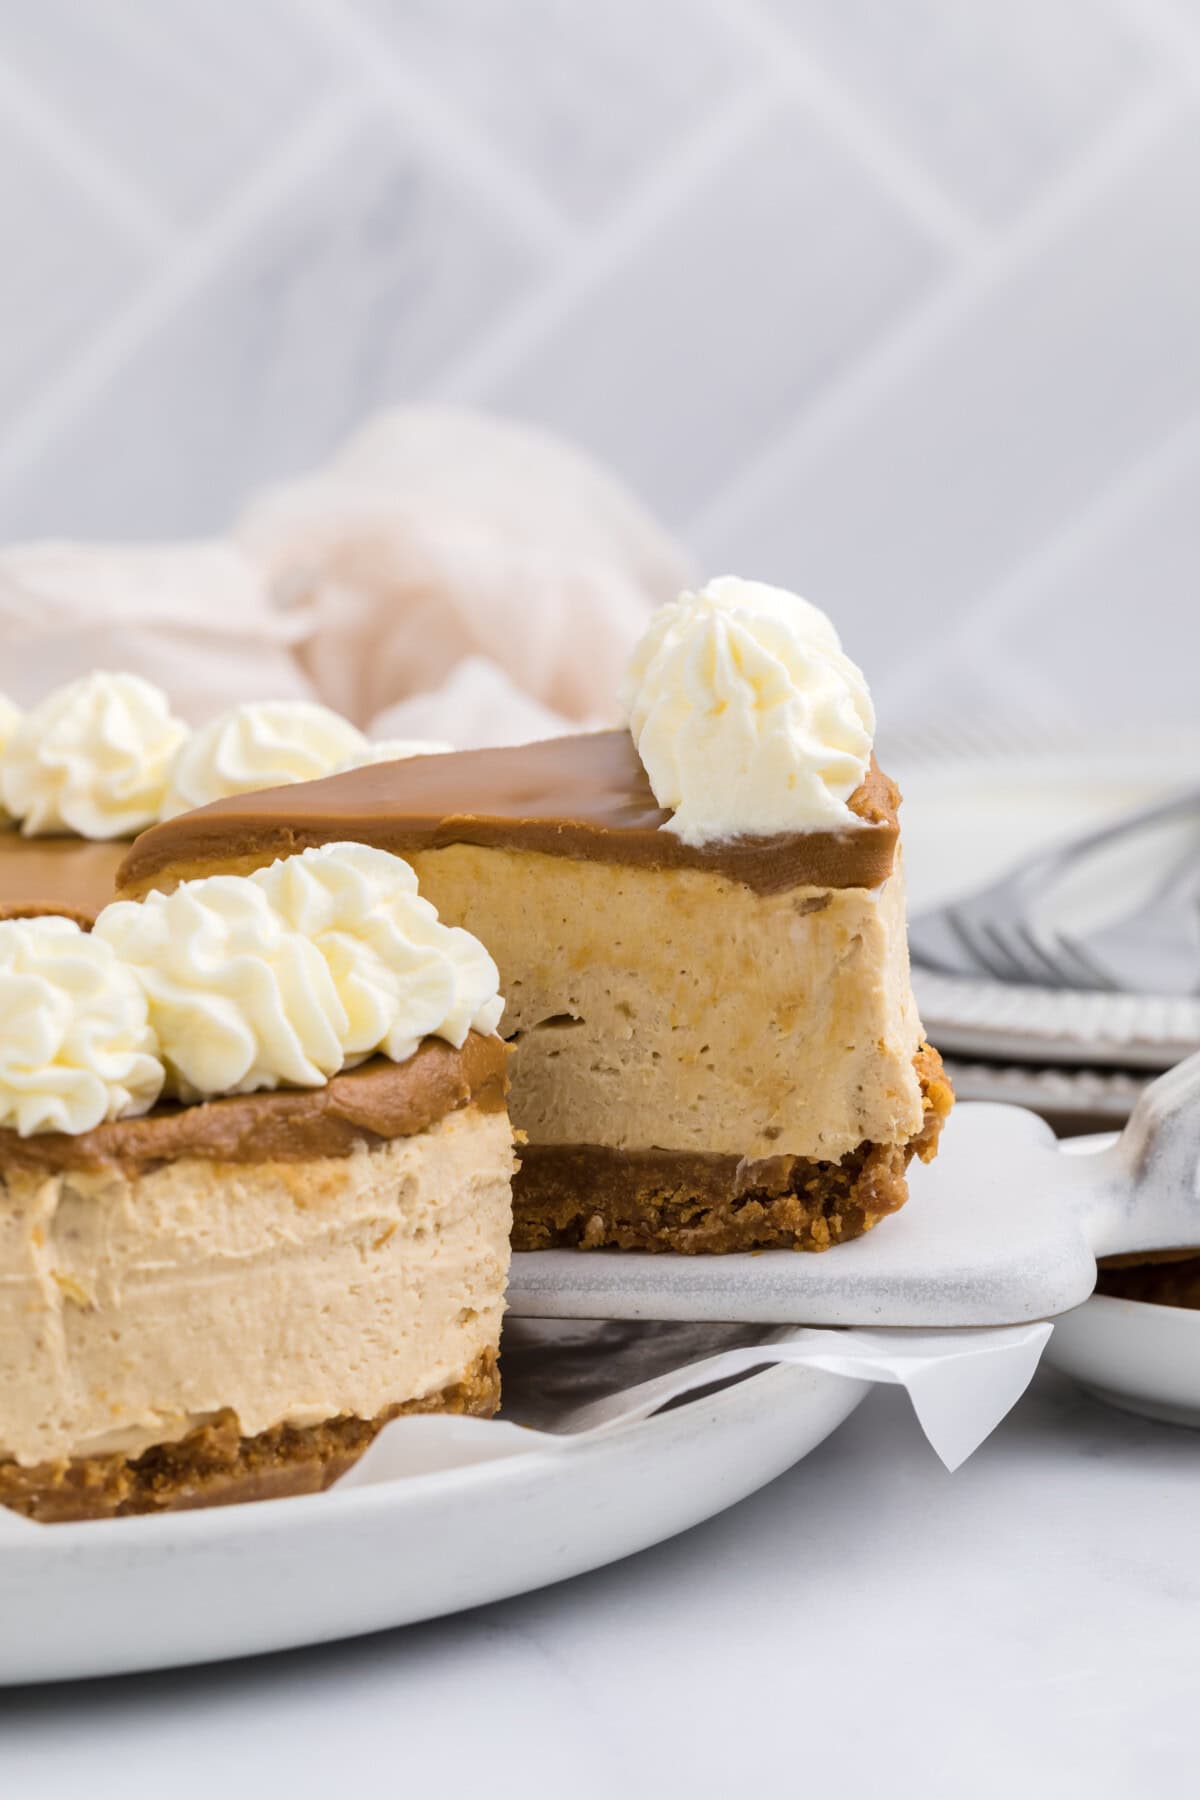
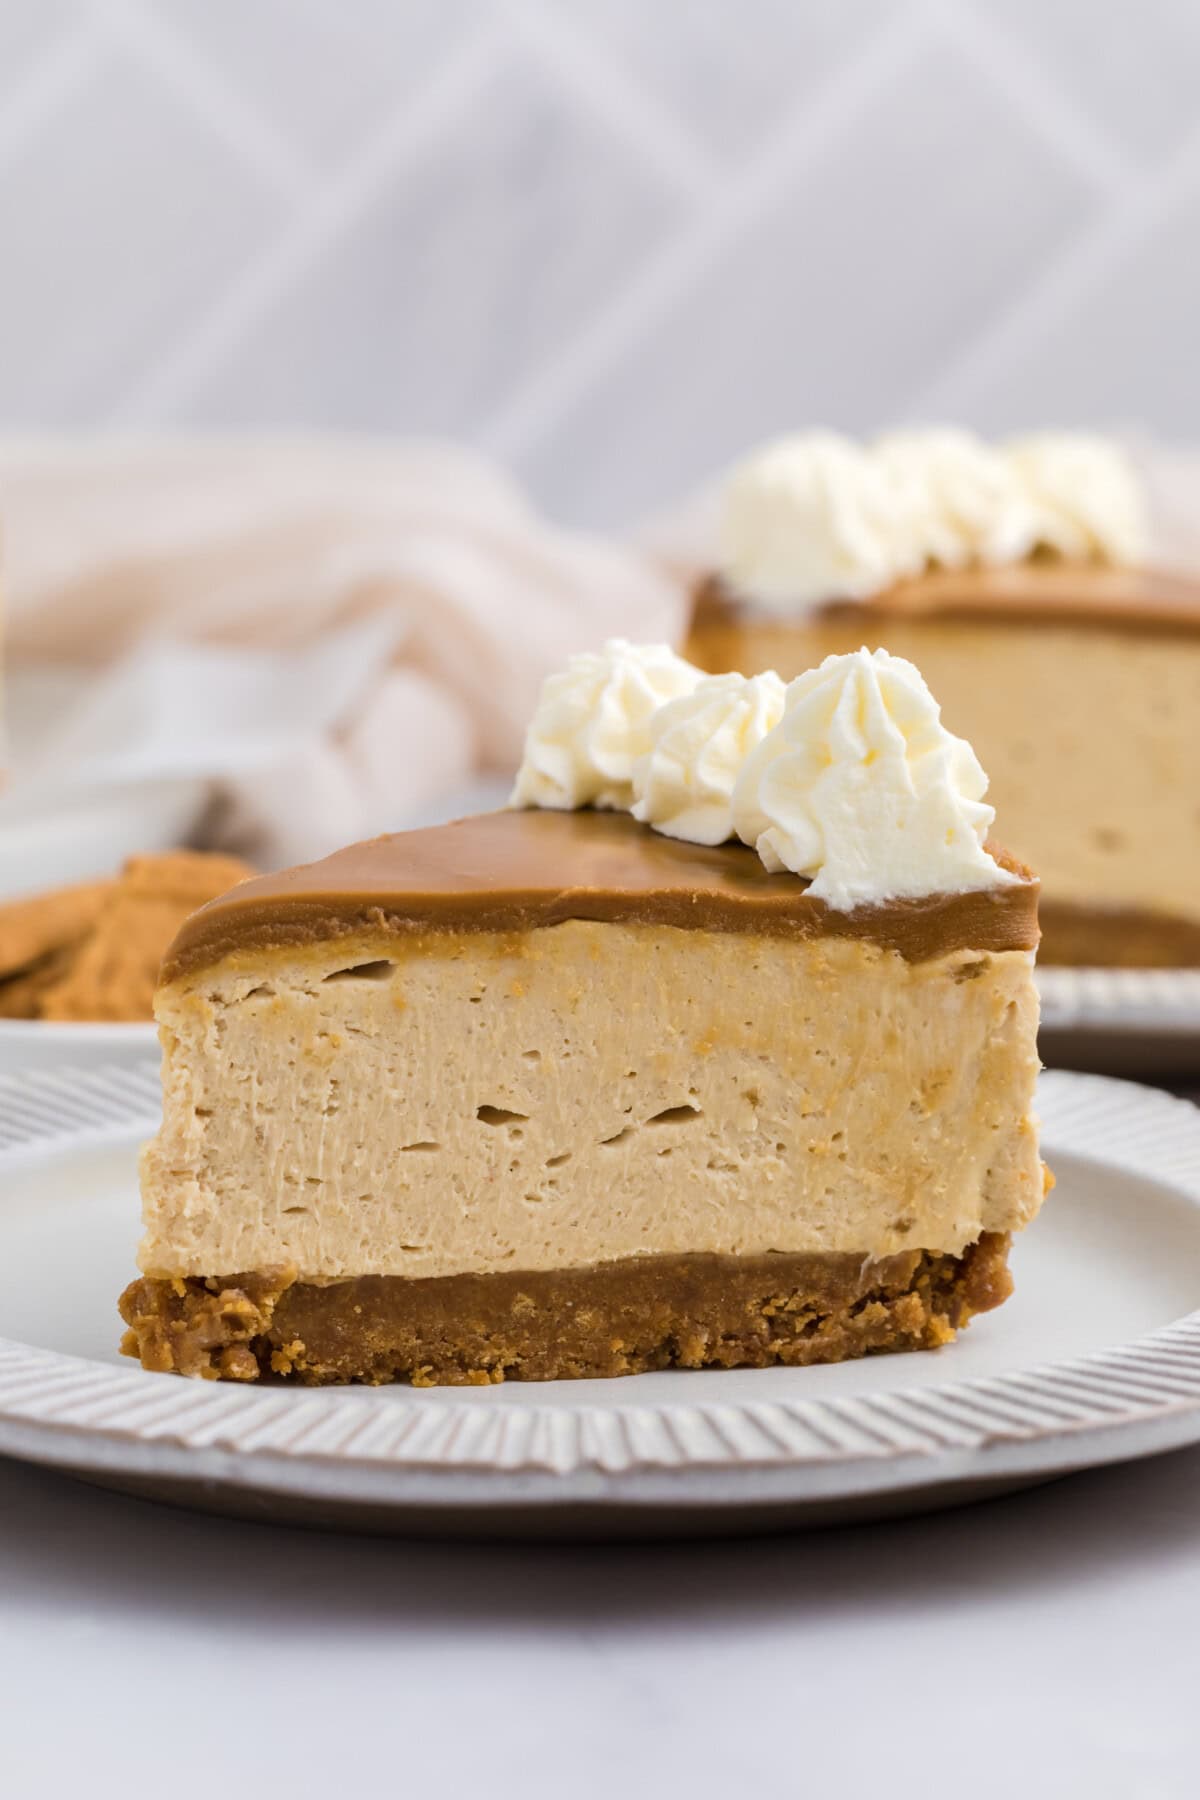
Rich and decadent with a deliciously creamy texture, this no-bake Biscoff cheesecake has everyone’s holiday favorite written all over it 🤩. You can prepare it the night before and it’s perfect the next day.
Cheesecake can be tough. Trust me, I’ve had my fair share of fails. This one makes it super easy because there’s no baking involved. As long as you keep the ingredients at the right temperature (soft and room temp is key) this will come out perfect.
I am a firm believier than not every dessert needs to be low calorie or packed with protein, especially around the holidays. Dessert is my favorite part of a holiday meal and this one is guarenteed to be a crowd favorite.
For more holiday treats, try these Chocolate Pumpkin Swirl Fudge Brownies and Dark Chocolate Coffee Cookies.
[ez-toc]
Why you’ll love this recipe
- No water bath or baking needed.
- Great make-ahead dessert for holidays.
Ingredients and Substitutions:
These are the main ingredients and substitutions for this no bake biscoff cheesecake. See recipe card below for full ingredients list and instructions.
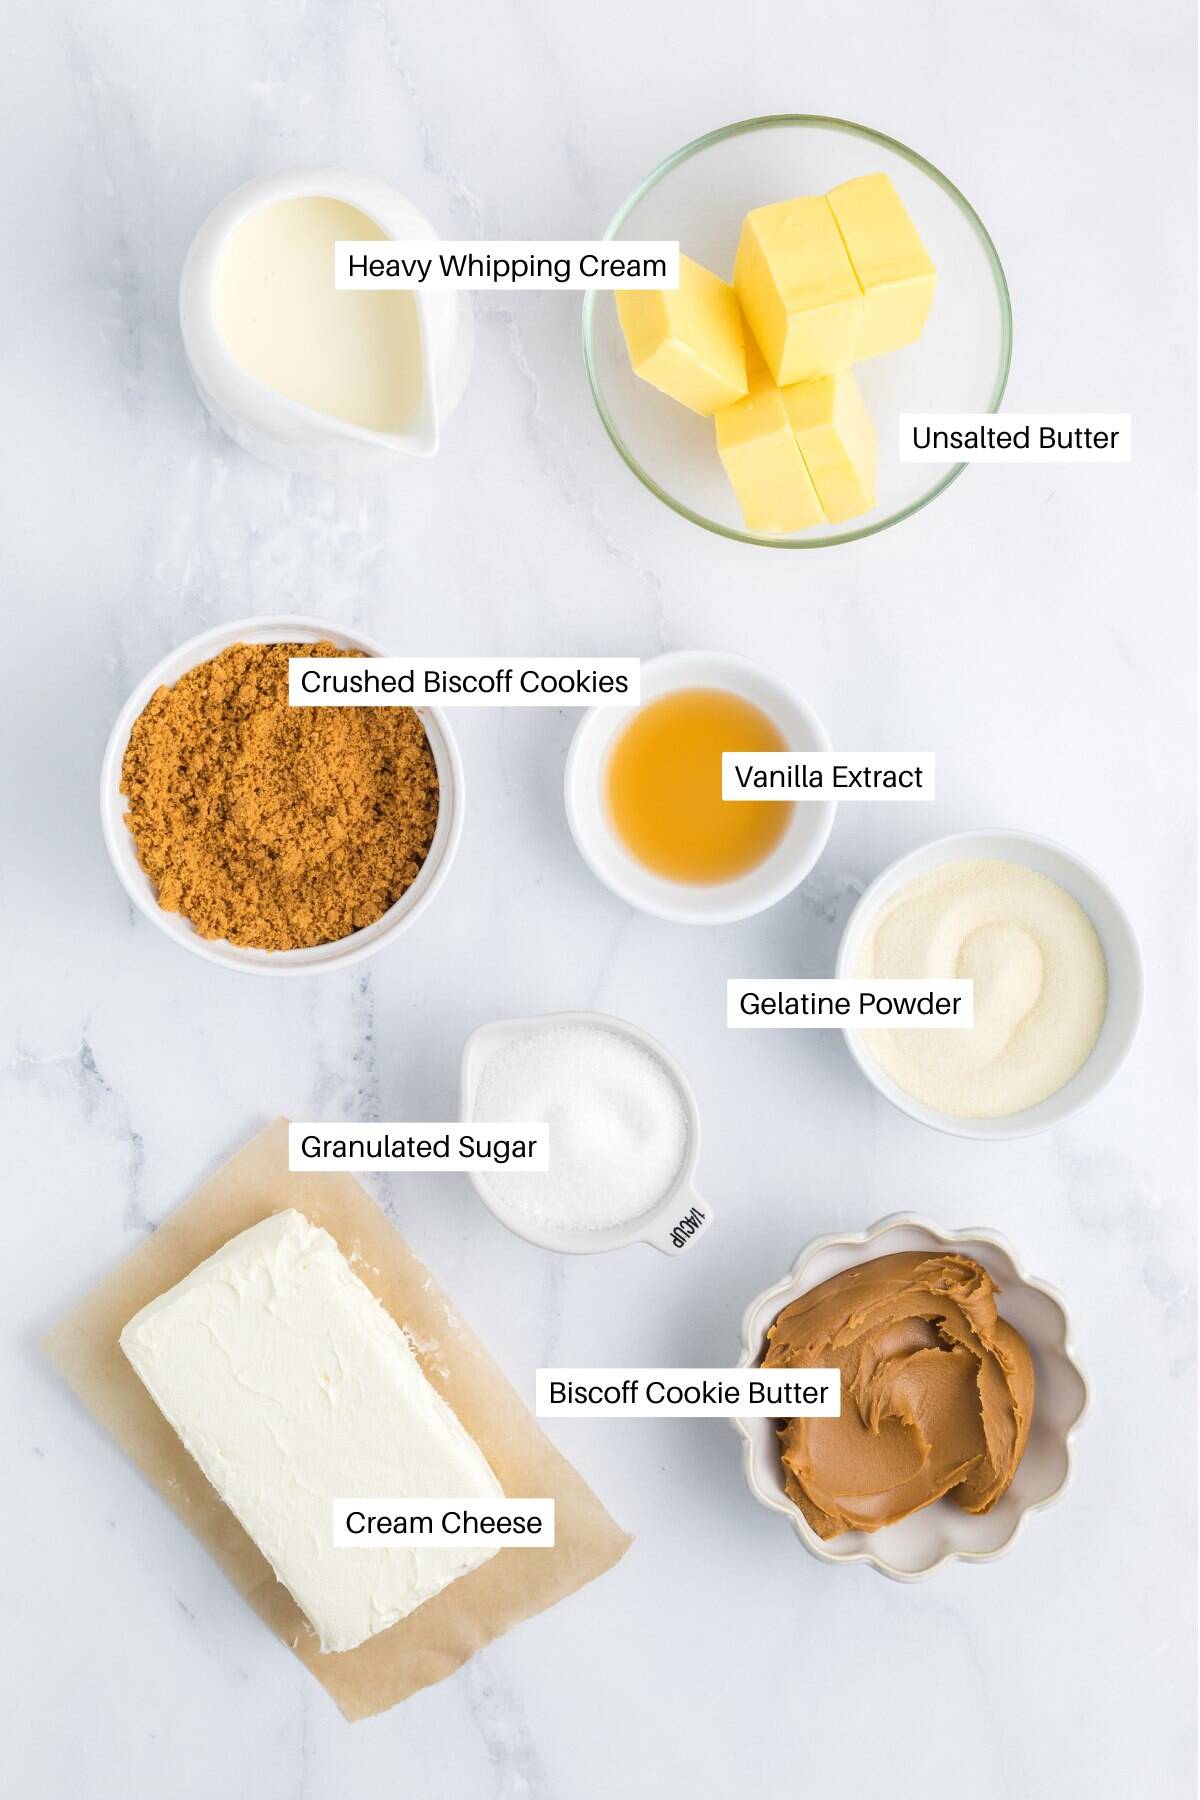
- Biscoff Cookies: used for the Biscoff cookie crust. You’ll need about 32 cookies. You can also use graham crackers.
- Unsalted Butter: salted is fine if that’s what you have.
- Gelatin Powder: you’re going to “bloom” the gelatin before adding to the recipe which will ensure it mixes into the cheesecake filling without clumping. Make sure it’s unflavored.
- Heavy Whipping Cream: keep this in the fridge until ready to whip.
- Full-Fat Cream Cheese: softened to room temperature. Using cold cream cheese can result in lumps of cream cheese in the filling. Be sure to use the block of cream cheese and not whipped cream cheese.
- Granulated Sugar: or powdered sugar.
- Vanilla Extract
- Biscoff Cookie Spread: microwave for a few seconds to soften it up, if it’s too hard to spread.
- Whipped Cream: used to decorate the finished cheesecake, however this is optional and can be omitted if preferred.
Variations
- To make this pretty, add Biscoff biscuits around the cake. I like to dip the cookies into the soft cheesecake for that extra crunch factor.
Dietary Modifications
- This recipe doesn’t adapt well to gluten or dairy-free substitutions.
How to make this no-bake cheesecake recipe (a step-by-step visual guide):
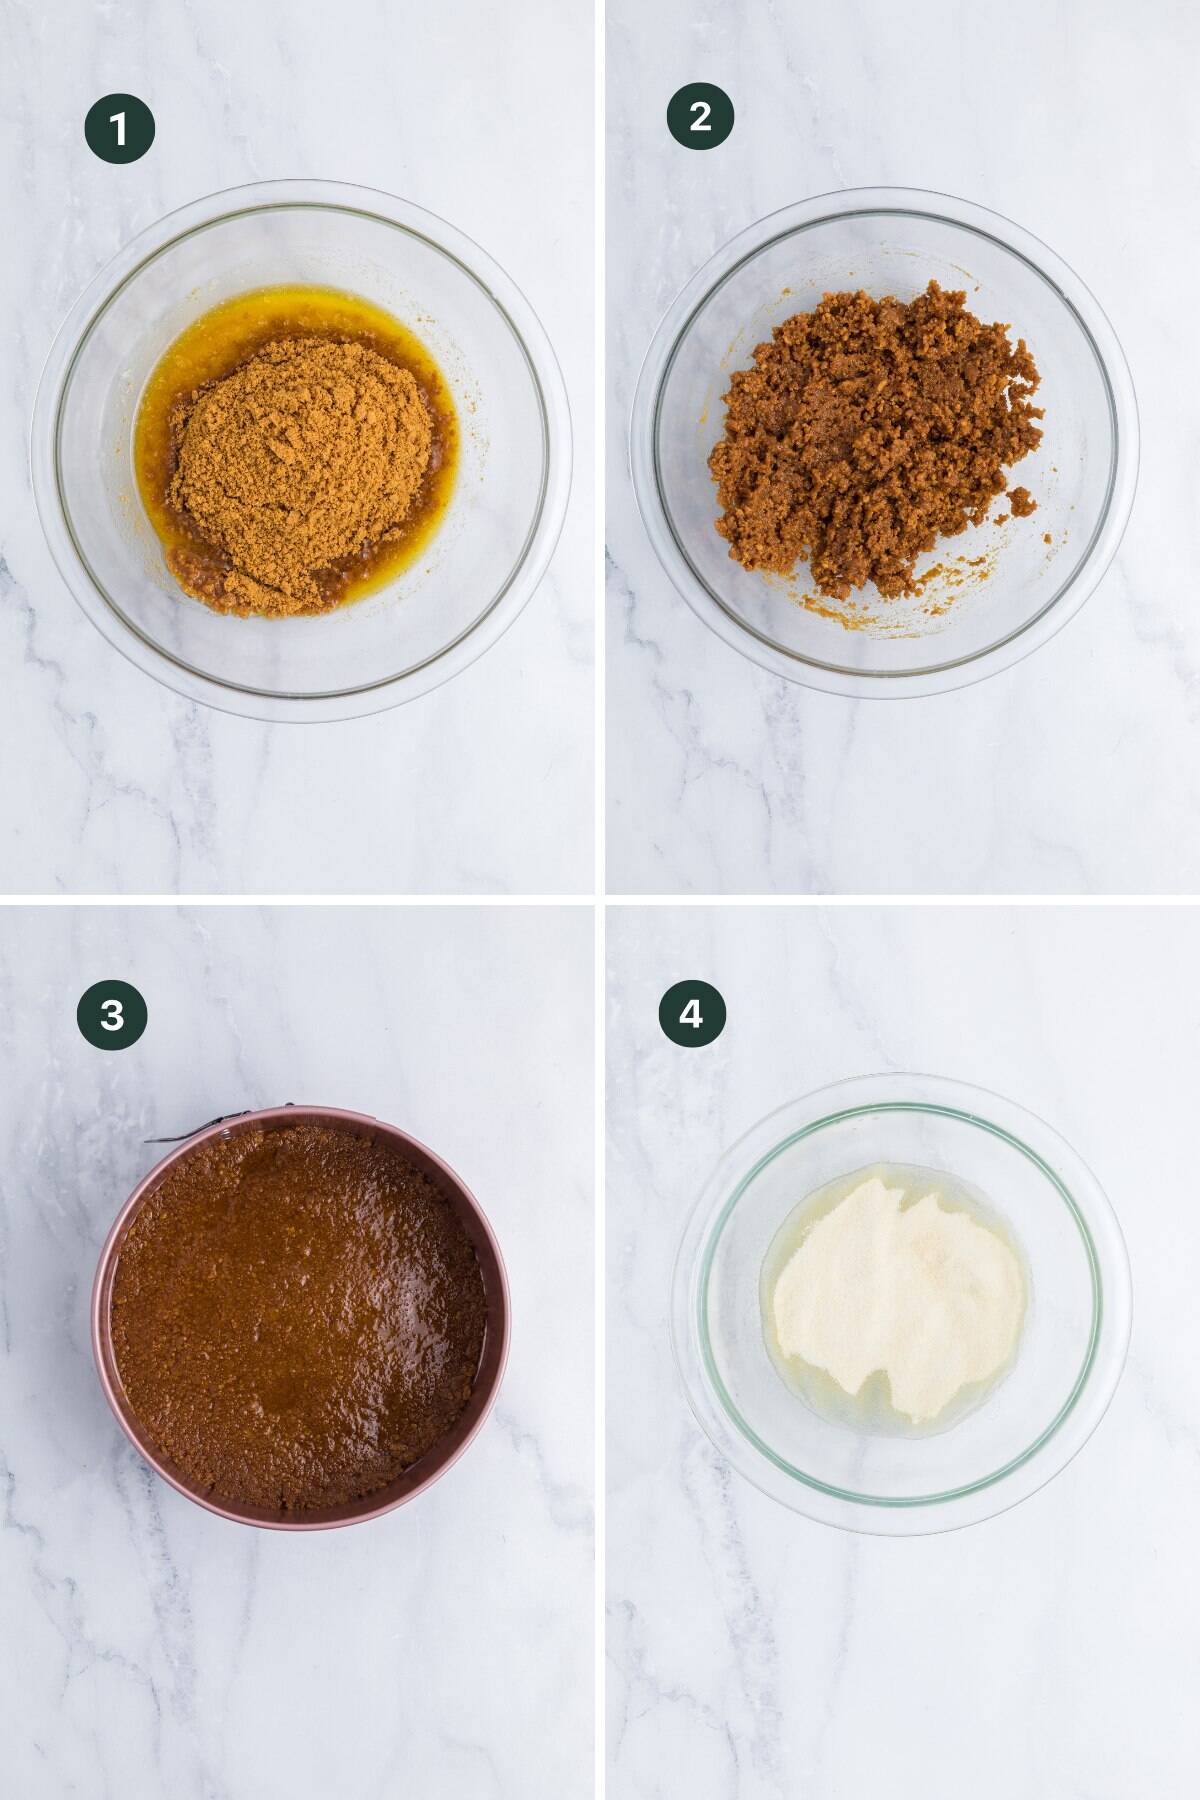
Step 1: prep pan and make cookie crust
Line the base of an 8-inch round springform pan with parchment paper. Set aside. Use a food processor to make cookie crumbs. If you don’t have a food processor, put cookies in a freezer size Ziplock bag and use a rolling pin to smash the cookies into fine crumbs. Kids love this part!
Add the crushed biscoff cookies and melted butter to a large mixing bowl (image 1). Mix until well combined and the mixture resembles wet sand (image 2). Press the mixture firmly into the base of the prepared baking tin and transfer to the fridge to begin setting while making the filling (image 3).
To bloom the gelatine, add the water to a small mixing bowl (image 4), and sprinkle over the gelatine powder. Whisk until well combined. Leave to sit for 5 minutes or until the gelatine is firm. Microwave for 15-20 seconds, or until liquid. Do not let the water and gelatin mixture get too hot, remove when the mixture becomes a liquid. Whisk once again until smooth, then set aside to cool for 5 minutes.
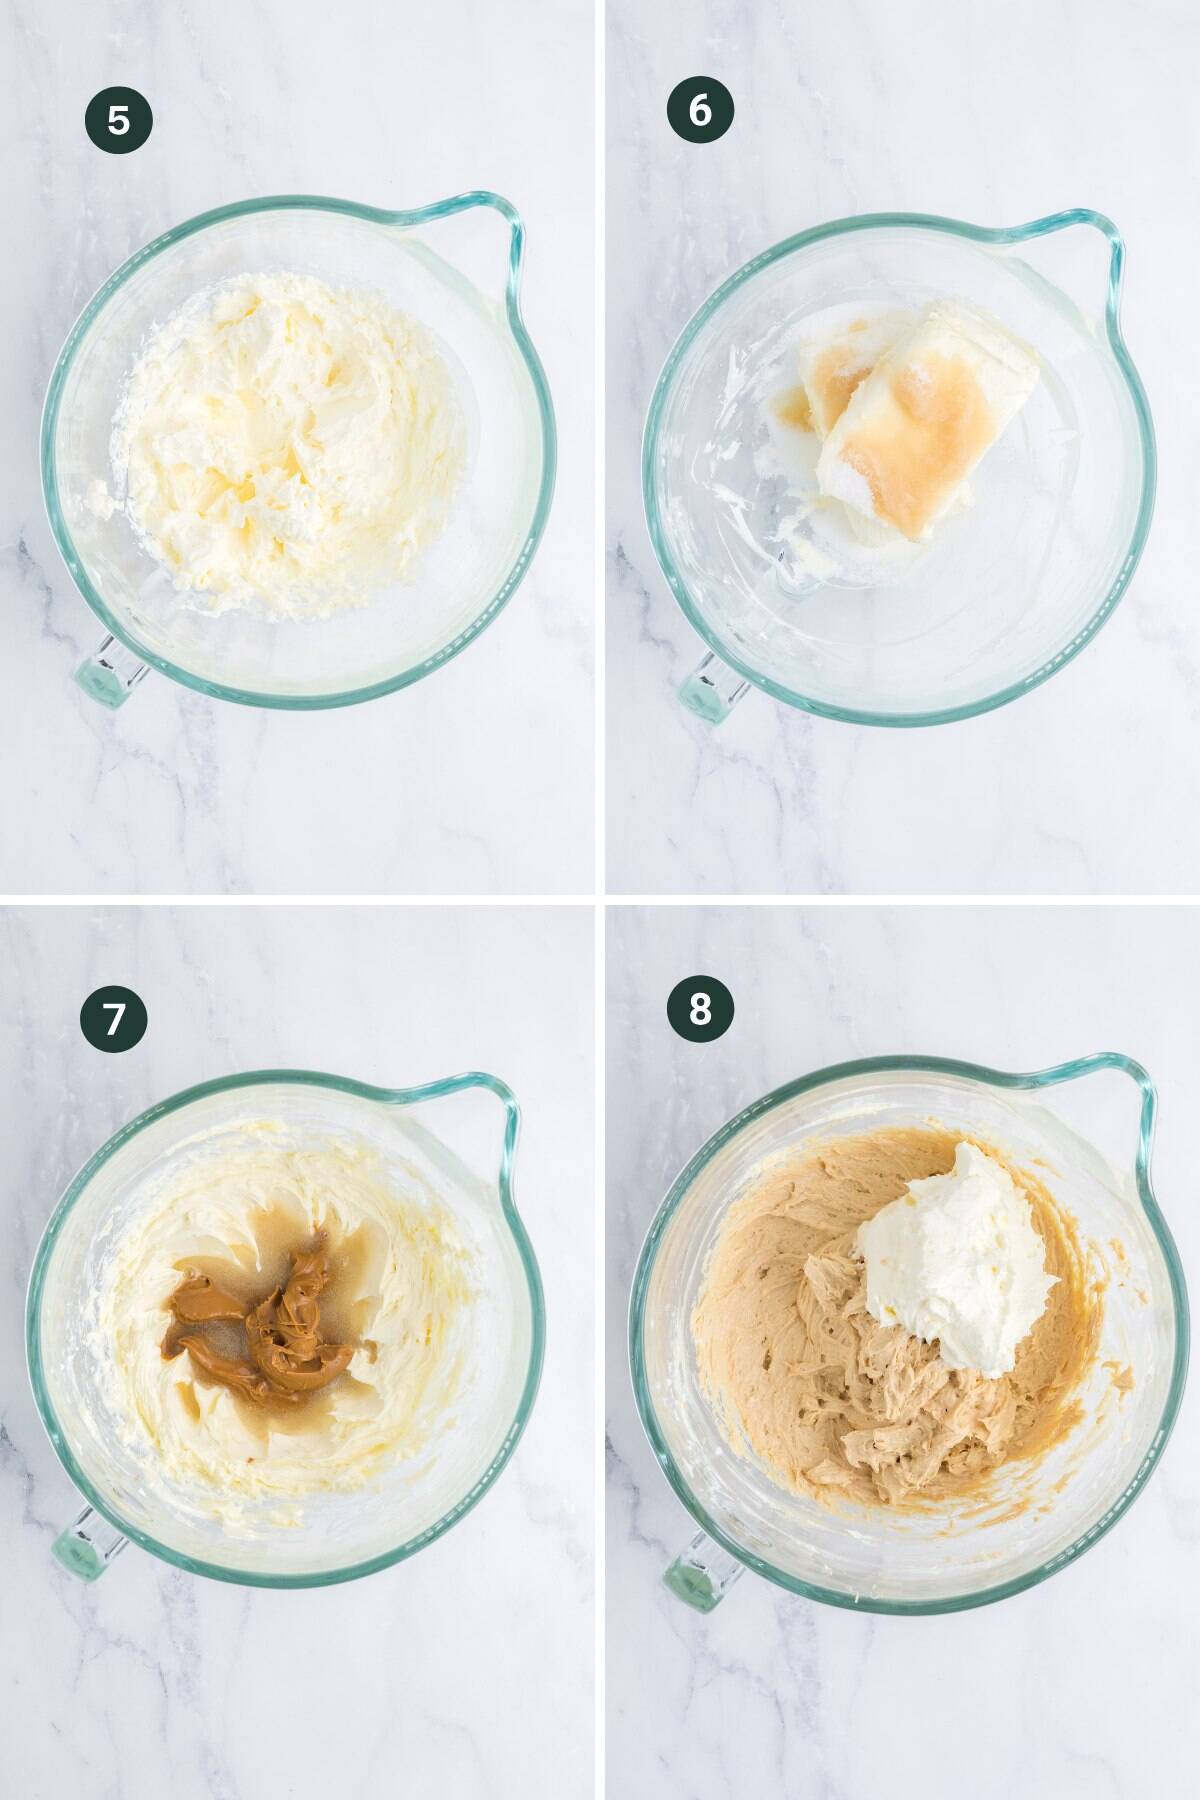
Step 2: make the creamy filling
Add the heavy cream to the bowl of a stand mixer or use a hand mixer. Beat on a medium-high speed using a wire whisk attachment for 2-3 minutes, or until stiff peaks form (image 5). Transfer to another mixing bowl and set aside.
Without cleaning the stand mixer bowl or whisk attachment, add the softened cream cheese, granulated sugar and vanilla extract to the bowl (image 6). Beat on a medium speed for 1-2 minutes, scraping the sides of the bowl as necessary, until the mixture is smooth and well combined.
Add the cooled gelatin and softened Biscoff spread to the cream cheese mixture (image 7). Beat on a low-medium speed until just combined. Fold through the whipped cream (image 8).
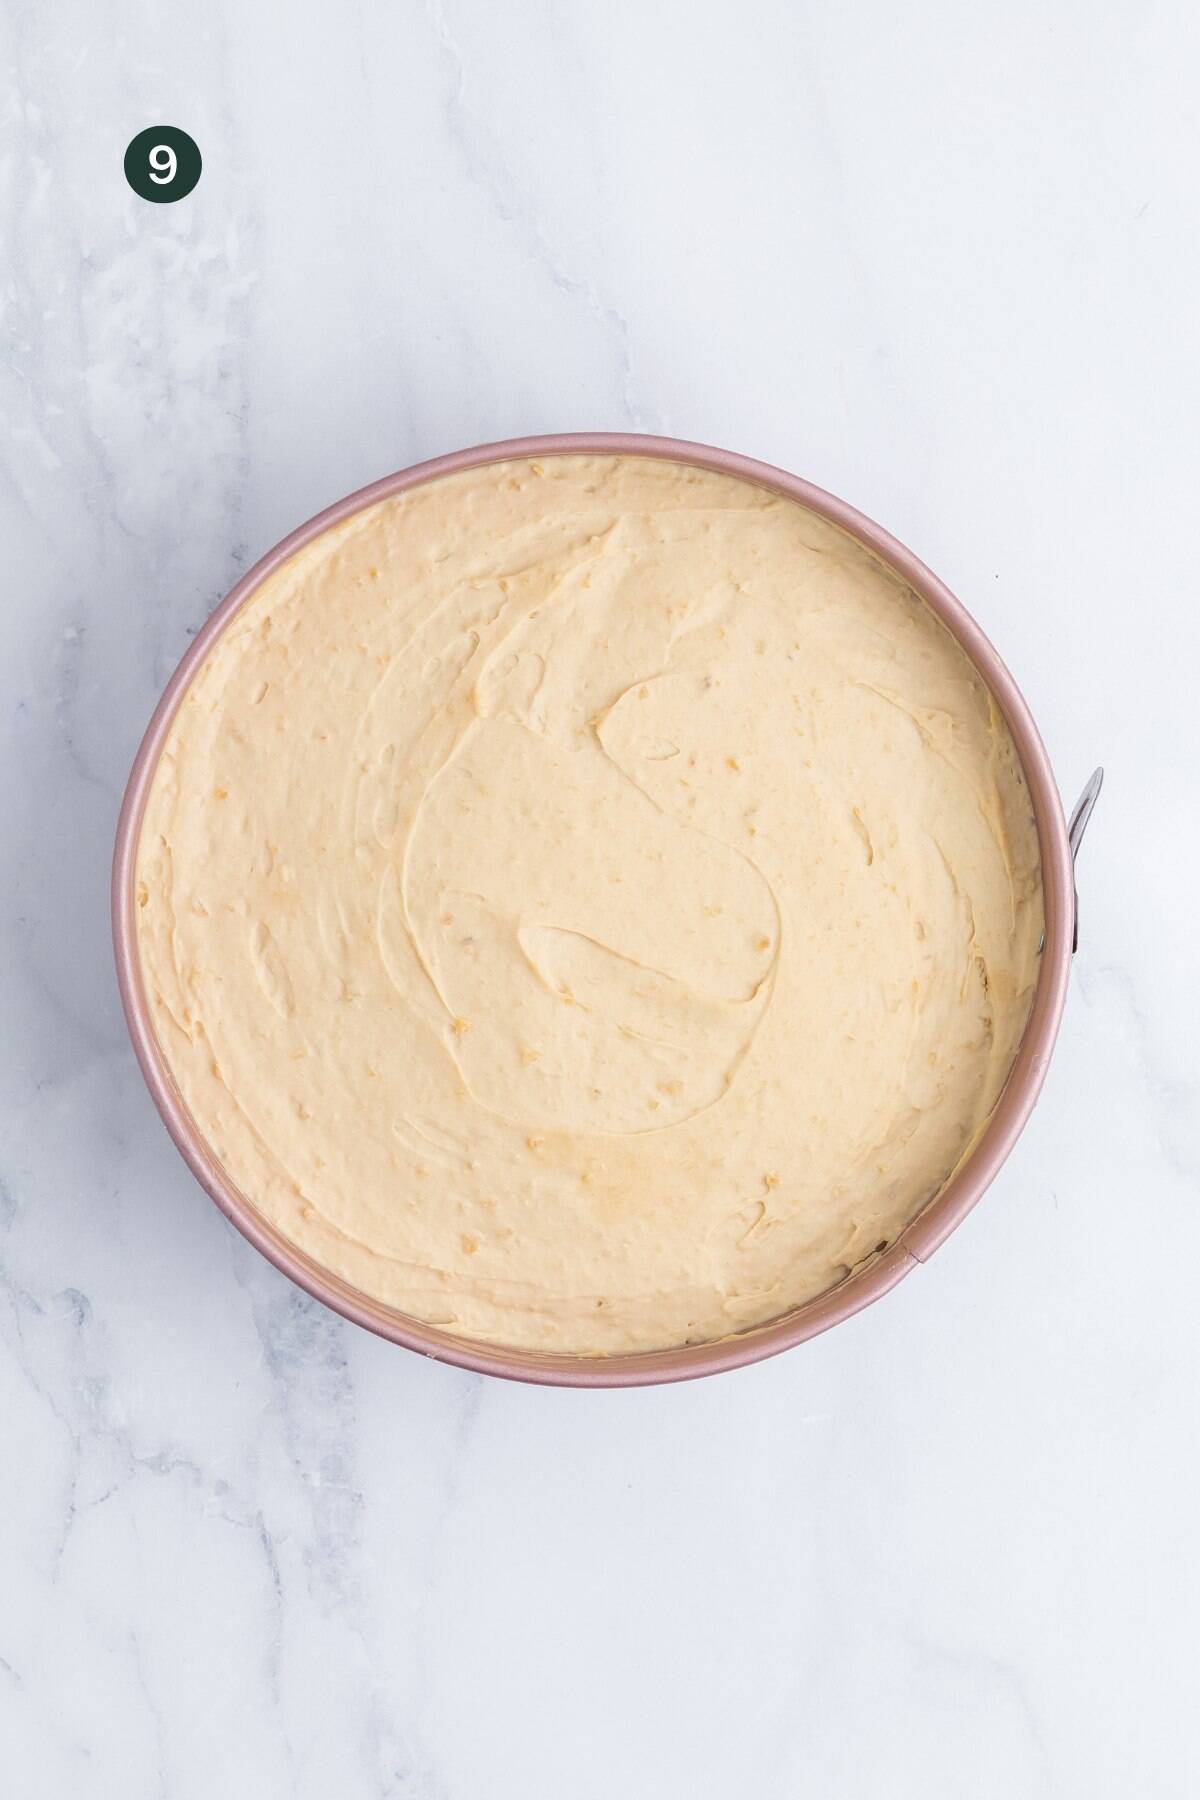
Step 3: add cheesecake to the prepared pan and chill
Spoon the cheesecake batter over the crust layer, and smooth the surface (image 9). Transfer to the fridge to set for at least 6 hours, preferably overnight.
Step 4: add biscoff topping
Melt the Biscoff spread for the topping in the microwave for 20-30 seconds, or until melted, then spread over the cheesecake filling (image 10). Return to the fridge to set for a further 30 minutes.

Step 5: remove, add whipped cream and serve
Remove the cheesecake from the tin. Using a piping bag, decorate the cheesecake with the whipped cream (image 11), if using, before slicing and serving.

Expert Tip!
Run a sharp knife around the outside of the chilled cheesecake for easy removal from the tin.
Recipe FAQs
Store in an airtight container in the refrigerator for up to 5 days or freeze
for up to 3 months. Thaw in the fridge before eating.
Check out our other easy dessert recipes!
If you make this recipe, please leave a rating and/or comment! Tag me on Instagram @ohsnapmacros, I love hearing from you!
No Bake Biscoff Cheesecake
📱 MyFitnessPal & MacrosFirst App Users
You can find this recipe and many others on MyFitnessPal and MacrosFirst by searching: Ohsnapmacros – No Bake Biscoff Cheesecake
Equipment
- 8 inch round springform pan
Ingredients
Crust
- 32 Biscoff cookies, crushed (approximately 2 cups)
- 1/2 cup unsalted butter, melted
Cheesecake Filling
- 3 tsp. gelatine powder
- 1/4 cup water
- 1 cup heavy whipping cream
- 16 oz. block cream cheese, softened to room temperature
- 1/4 cup granulated sugar
- 1 tsp. vanilla extract
- 1 cup Biscoff spread, softened
Topping
- 3/4 cup Biscoff spread, softened
- 1 cup whipped cream (optional)
Instructions
- Line the base of an 8-inch round springform tin with parchment paper. Set aside.
- Add the crushed biscoff cookies and melted butter to a large mixing bowl. Mix until well combined and the mixture resembles wet sand. Press the mixture firmly into the base of the prepared baking tin and transfer to the fridge to begin setting while making the filling.
- To bloom the gelatine, add the water to a small mixing bowl, and sprinkle over the gelatine powder. Whisk until well combined. Leave to sit for 5 minutes or until the gelatine is firm. Microwave for 15-20 seconds, or until liquid. Do not let the water and gelatin mixture get too hot, remove when the mixture becomes a liquid. Whisk once again until smooth, then set aside to cool for 5 minutes.
- Add the heavy cream to the bowl of a stand mixer. Beat on a medium-high speed using a wire whisk attachment for 2-3 minutes, or until stiff peaks form. Transfer to another mixing bowl and set aside.
- Without cleaning the stand mixer bowl or whisk attachment, Add the softened cream cheese, granulated sugar and vanilla extract to the bowl. Beat on a medium speed for 1-2 minutes, scraping the sides of the bowl as necessary, until the mixture is smooth and well combined.
- Add the cooled gelatine and softened Biscoff spread to the bowl and beat on a low-medium speed until just combined. Fold through the whipped cream.
- Spoon the cheesecake filling over the crust layer, and smooth the surface. Transfer to the fridge to set for at least 6 hours, preferably overnight.
- Melt the Biscoff spread for the topping in the microwave for 20-30 seconds, or until melted, then spread over the cheesecake filling. Return to the fridge to set for a further 30 minutes.
- Remove the cheesecake from the tin, then decorate the cheesecake with the whipped cream, if using, before slicing and serving.
Notes
- Heavy cream whips best when it is cold straight from the fridge.
- Blooming the gelatine before using hydrates the gelatine, and allows it to mix into the cheesecake filling without clumping
- It’s important not to let the gelatine boil when reheating, as this will affect its setting abilities.
- This is not meant to be a low calorie dessert, use low calorie options at your own discretion.
- Nutritional information is an estimate and will vary with substitutions.


Made this for a Christmas dinner party and it was a hit! I think it’s my MIL’s new favorite dessert! Next time, I might put it in the freezer for 30 min after adding the whipped cream around the rim. I didn’t do that this time, and the whipped cream melted pretty quickly. But taste-wise, it was perfectly decadent.
So glad you loved it!